April 22, 2026
April 2026
Home › Financial Stability › Emergency Fund & Cash Reserves › How to Build a $1,000 Starter Emergency Fund Fast
This article is part of the Emergency Fund & Cash Reserves cluster on PersonalOne — the complete framework for building, sizing, and maintaining emergency cash reserves that protect your financial system.
Don Briscoe is a financial systems strategist with 12+ years of experience helping Millennials and Gen Z build income and financial stability. He founded PersonalOne to provide the financial education he wished existed — structured, honest, and free.
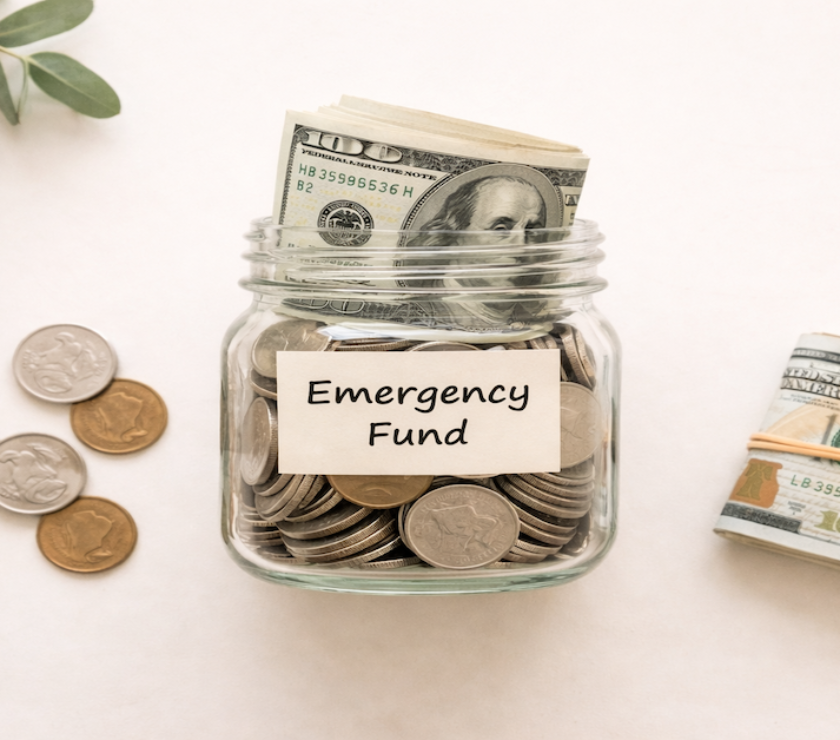
What You Need to Know
— $1,000 is the correct first target — it is enough to absorb most common financial shocks (car repair, medical copay, appliance failure) without going into debt
— The fastest path to $1,000: automate a fixed transfer to a dedicated HYSA on payday, reduce one spending category temporarily, and add any one-time income directly to the fund
— Most people can reach $1,000 in 4–12 weeks with consistent effort — the specific timeline depends on income and current spending flexibility
— Open a separate high-yield savings account before you start — money sitting in your checking account will not survive contact with a month of normal spending
— $1,000 is a starting point, not the finish line — once reached, the system stays in place and you build toward 3–6 months of expenses
The goal of how to build a $1,000 starter emergency fund fast is the single highest-leverage financial action most people without savings can take right now. The emergency fund system that financial coaches and the CFPB both recommend starts here: not because $1,000 is enough to cover a full financial crisis, but because it is enough to cover the most common unexpected expenses — a $600 car repair, a $300 medical copay, a $400 appliance failure — without going into debt. Breaking that debt cycle for small shocks is what changes the financial trajectory. The complete emergency fund framework, including how to size your fund beyond $1,000, is in the Emergency Fund Strategy guide.
The psychological effect of a $1,000 starter fund is equally important. Most people who have never had savings operate from a scarcity mindset — every unexpected expense triggers anxiety and often debt because there is no buffer. A $1,000 fund does not eliminate that anxiety entirely, but it eliminates it for the most frequent shocks. That psychological shift — from reactive to slightly buffered — creates the momentum needed to build further. Reaching $1,000 also proves the system works, which makes the next $1,000 feel achievable in a way it did not before. This is the foundation of the financial stability framework covered in the Financial Stability guide.
This article covers the specific steps: opening the right account, calculating your weekly savings target, identifying the fastest funding sources, and building the automation that keeps the fund growing without requiring ongoing willpower.
Step 1: Open a Dedicated Account Before You Save a Dollar
The first action is not saving money — it is opening the account where the money will live. Emergency fund savings kept in your primary checking account will not survive. Checking accounts are psychologically spent; money sitting there has a spending claim on it from the moment it arrives. The behavioral separation of a dedicated account at a different bank is what makes the savings stick.
Open a high-yield savings account (HYSA) at an FDIC-insured online bank before you make your first transfer. This takes 10–15 minutes. Look for zero fees, no minimum balance requirement, and a current APY above 4.00%. Verify FDIC insurance status at FDIC.gov before depositing. Once the account is open and linked to your checking account for transfers, the infrastructure is in place. Everything else is execution. The specific account types that work best, what to look for, and what to avoid are covered in the guide on where to keep your emergency fund.
Step 2: Set a Target Date and Work Backwards
Pick a target date 4–12 weeks from today. Divide $1,000 by the number of weeks. That is your weekly savings target. The math is simple — the execution requires a clear commitment to a specific number on a specific timeline.
| Timeline | Weekly Savings Needed | Monthly Savings Needed |
|---|---|---|
| 4 weeks | $250/week | $1,000/month |
| 6 weeks | $167/week | ~$667/month |
| 8 weeks | $125/week | $500/month |
| 12 weeks | $83/week | ~$333/month |
| 26 weeks | $38/week | ~$154/month |
Choose the timeline that is aggressive but achievable. A target that requires genuinely stretching your spending is more effective than a comfortable target that extends indefinitely. The goal is to feel the build, hit the milestone, and experience the momentum shift that comes from having savings for the first time.
Step 3: Automate the Transfer on Payday
Set up an automatic transfer from your checking account to your HYSA to execute on the day your paycheck arrives. If you are paid biweekly, set the transfer for the morning of each payday. If you are paid monthly, set it for the first of the month. The principle: savings come out before you have the opportunity to spend them. Every dollar that sits in checking gains a spending claim. Every dollar transferred on payday before you check your balance has already been “spent” on savings.
The amount of the automatic transfer should be your weekly or biweekly savings target — not the amount you think you can comfortably save after expenses. Set it slightly higher than comfortable. If it creates a cash flow problem in week one, you adjust. If it does not create a problem, you have just discovered that you had more flexibility than you thought.
Step 4: Accelerate with One-Time Funding Sources
The automatic transfer builds the fund reliably. One-time windfalls accelerate it significantly. Every dollar from a non-recurring income source that goes directly to the emergency fund rather than spending shortens the timeline without requiring permanent lifestyle changes.
Tax refunds. A tax refund deposited directly to your HYSA can fund a significant portion of the $1,000 target in a single transaction. If you typically receive a refund and you are building your emergency fund during tax season, direct deposit to the HYSA rather than checking. This is the single highest-leverage one-time action for most people building a starter fund in the first quarter of the year.
Selling items. A focused sell-off of unused items over 2–4 weeks — electronics, clothes, furniture, sporting equipment — commonly generates $200–$600 for most households. Every dollar goes directly to the HYSA.
Temporarily suspending one spending category. Identifying a single non-essential spending category to pause for 4–8 weeks and redirecting that exact amount to the HYSA on the same cadence. The key is specificity: “I’m redirecting $200/month in dining out to my emergency fund for 5 months” works. “I’ll spend less” does not.
One-time extra income. Overtime pay, a freelance project, a cash side hustle, selling a service — any income above your regular paycheck that arrives during the build period goes directly to the emergency fund.
What Happens After You Hit $1,000
Do not stop the automatic transfer. The goal of reaching $1,000 is not to then turn off the savings mechanism — it is to prove the mechanism works and shift toward building the full 3–6 month emergency fund target. The automatic transfer that got you to $1,000 stays in place and continues at the same or a slightly reduced rate as you address other financial priorities in parallel (debt payoff, retirement contributions).
The $1,000 milestone is also the point to calculate your full fund target. The right number depends on your income stability, household structure, and fixed expense load — and it is almost certainly different from the generic “3–6 months” estimate most people start with. The framework for calculating your specific number is in the guide on how much emergency fund you actually need. Once you know your real target, you will also want to think about building sinking funds alongside the full emergency fund — the distinction between the two and how they work together is in the sinking funds vs emergency funds guide.
$1,000 is the start. The system is what matters.
The complete emergency fund framework — how to size it, where to keep it, and how to maintain it — is in the Emergency Fund Strategy guide.
Explore Emergency Fund & Cash Reserves → Financial Stability Hub →Resources
Official Sources
CFPB — Savings Tools and Resources — Consumer Financial Protection Bureau guidance on building savings, how to choose savings accounts, and tools for tracking progress toward savings goals.
FDIC — Consumer Resource Center — FDIC guidance on FDIC-insured savings products, how deposit insurance works, and how to verify coverage before opening an account.
Frequently Asked Questions
Why $1,000 specifically? Why not $500 or $2,000?
$1,000 is the threshold at which the fund can absorb most common unexpected expenses without requiring debt. The Federal Reserve’s consumer financial research consistently shows that Americans without liquid savings absorb small shocks through credit cards or loans, which adds interest cost on top of the original expense. A $600 car repair that goes on a credit card at 24% APR and takes 6 months to pay off costs approximately $650 total. The same repair paid from a $1,000 emergency fund costs $600.
What if I have high-interest debt? Should I pay that off first?
Build the $1,000 starter emergency fund before accelerating debt payoff. This is counterintuitive but important: without a small cash buffer, every new unexpected expense goes back on a credit card, which undoes the debt payoff progress. The $1,000 starter fund breaks the cycle. Once the starter fund is in place, direct the maximum available cash flow toward high-interest debt while maintaining the starter fund.
What counts as an emergency fund emergency?
True emergency fund use cases: unexpected medical expense, necessary car repair (car needed for work), essential home repair (broken heating system in winter), urgent travel for a family emergency, job loss income gap. Not emergency fund use cases: vacation, sale items, routine expenses you forgot to plan for, holiday gifts, discretionary spending in a tight month. The test is whether the expense is unexpected, necessary, and would otherwise require debt.
What do I do if I use the emergency fund?
Replenish it immediately and with the same priority that built it. Treat the replenishment as a financial obligation with the same urgency as a bill payment. Restore the automatic transfer if you paused it. Add a one-time higher transfer to rebuild faster. A used emergency fund that gets replenished within 60–90 days is the system working correctly. A used emergency fund that stays depleted is a financial stability risk.
Disclaimer: This article is for informational and educational purposes only. Savings rates, interest calculations, and financial product availability change — verify current terms directly with financial institutions. This content does not constitute financial advice.